Machine Learning APIs
31 May 2019Overview
APIs (Application Programming Interfaces) are software programs that give developers access to computing resources and data. Companies from many different fields offer publicly available APIs so that developers can integrate specialized tools, services, or libraries with their own applications and codebase.
This lab will teach you about the architecture and basic functioning of APIs. This will be supplemented with hands-on practice, where you will configure and run Cloud Storage API methods in Google Cloud Shell. After taking this lab you will understand key principles of API communication, architecture, and authentication. You will also gain practical experience with APIs, which you can apply to future labs or projects.
Objectives
In this lab, you will learn about:
- Google APIs
- API architecture
- HTTP protocol and methods
- Endpoints
- REST (Representational State Transfer) and RESTful APIs
- JSON (JavaScript Object Notation)
- API authentication services
Prerequisites
This is an introductory level lab. This assumes little to no prior knowledge of APIs or experience using Google APIs. Familiarity with shell environments and command line interface tools is recommended, but not required. Familiarity with the GCP Console and Cloud Storage is recommended, so please at a minimum take the following labs before attempting this one:
Once you’re ready, scroll down and follow the steps below to set up your lab environment.
Setup and Requirements
Qwiklabs setup
Before you click the Start Lab button
Read these instructions. Labs are timed and you cannot pause them. The timer, which starts when you click Start Lab, shows how long Cloud resources will be made available to you.
This Qwiklabs hands-on lab lets you do the lab activities yourself in a real cloud environment, not in a simulation or demo environment. It does so by giving you new, temporary credentials that you use to sign in and access the Google Cloud Platform for the duration of the lab.
What you need
To complete this lab, you need:
- Access to a standard internet browser (Chrome browser recommended).
- Time to complete the lab.
Note: If you already have your own personal GCP account or project, do not use it for this lab.
APIs - What and Why
As mentioned earlier, an API (Application Programming Interface) is a software program that gives developers access to computing resources and data. APIs adhere to specific rules and methods to clearly communicate requests and responses.
The ability to access data and computing resources greatly increases a developer’s efficiency. It is much easier to use an API than to build every single program, method, or dataset from scratch. APIs are built on the principle of abstraction—you don’t need to understand the inner workings or complexities of an API to use it in your own environment.
APIs are built with the developer in mind and often times do not offer a graphical user interface (GUI). However, there are exceptions to this standard. Google has released a new tool called APIs Explorer, which allows you to explore various Google APIs interactively (be sure to check out the APIs Explorer: Qwik Start lab afterwards if you are interested in learning more.)
APIs in GCP
Google offers APIs that can be applied to many different fields and sectors. APIs are often used in web development, machine learning, data science, and system administration workflows. However, these are only a handful of use cases. If you explore AnyAPI, for example, you will start to see just how many APIs are available.
When Qwiklabs provisions a new GCP Project for a lab instance, it enables most APIs behind the scenes so you can work on the lab’s tasks right away. If you create your own GCP projects outside of Qwiklabs, you will have to enable certain APIs yourself.
As you gain proficiency as a GCP user, you will start to use more APIs in your workflow. Experienced GCP users will integrate and use Google APIs in their local environments almost exclusively, rarely using the GCP Console to run tools and services. Dozens of labs are available that give you practice with various Google APIs in different languages. Here are two for example:
- Cloud Natural Language API: Qwik Start
- Entity and Sentiment Analysis with the Natural Language API You will now explore the API library to see what Google APIs are available.
API Library
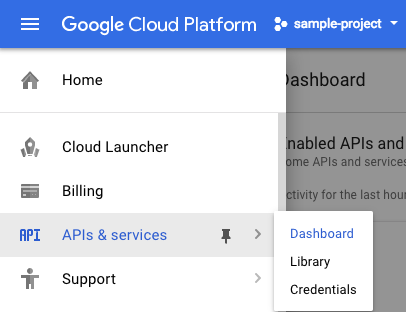
Open the Navigation menu and select APIs & Services > Library:
The API library offers quick access, documentation, and configuration options for 200+ Google APIs. Even though it’s housed in the Console, it’s important to note that the library offers access to all Google APIs — not only GCP centric ones. This highlights an important theme: APIs are fundamental to all Google services, and Google APIs don’t all fall under the GCP category.
Time for some hands-on practice enabling an API in the API library. Assume that you are a mobile developer for a fitness site and you want to use the Google Fitness API to build your application.
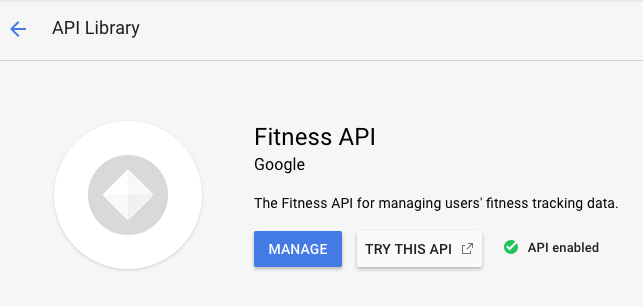
In the “Search for APIs and Services” search bar, type in Fitness API and press Enter. Click on the Fitness API from the result list. Then, click Enable. If you return to the Fitness API in the API library by clicking on the back button in your browser window twice, you will see that the API is now enabled:
The API library provides links to tutorials and documentation, terms of service, and interactive methods offered in the APIs Explorer. To see metric and usage information, you will use the API Dashboard.
API Dashboard
Inspect the Fitness API in the GCP Console’s API Dashboard. Open the navigation menu and and select APIs & Services > Dashboard:
The API Dashboard details your project’s usage of specific APIs, including traffic levels, error rates, and even latencies, which helps you quickly triage problems with applications that use Google services.
From the API list, select Fitness API:
From this page you can view and request quotas, control access to resources and data, and view metrics. To see one of these features in action, select Quotas from the left-hand menu.
This shows you how many queries this API allows per day, per user, and per second:

Now that you’ve gotten experience provisioning a non-GCP API, the rest of the hands-on practice will involve the Google Cloud Storage API. You will now learn about the architecture and basic functioning of APIs.
API Architecture
APIs are a set of methods that allow programs to communicate with one another. To communicate effectively, programs need to adhere to a clear protocol that governs the transfer and interpretation of data.
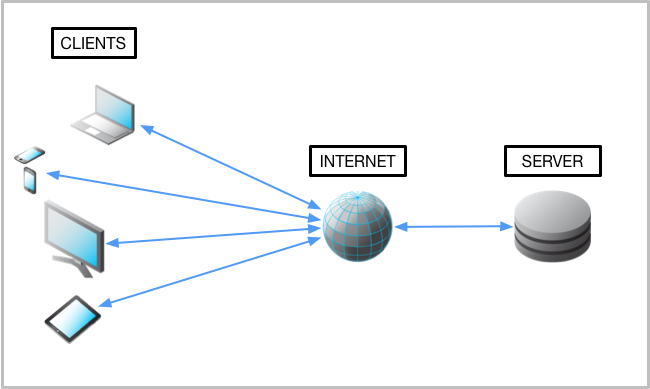
Client-server model
The internet is the standard communication channel that APIs use to transmit requests and responses between programs. The client-server model is the underlying architecture that web-based APIs use for exchanging information.
The client is a computing device (e.g. a smartphone, laptop, etc.) that makes a request for some computing resource or data. The client’s request needs to be formatted in the agreed upon protocol.
The server has data and/or computing resources stored on it. Its job is to interpret and fulfill a client’s request.
The following is a visual representation of the client-server model:
HTTP protocol and request methods
Since APIs use the web as a communication channel, many of them adhere to the HTTP protocol, which specifies rules and methods for data exchange between clients and servers over the internet. The HTTP protocol is not only used by APIs — it is the standard for web communication where data is sent and received over the internet.
APIs that utilize the HTTP protocol use HTTP request methods (also known as “HTTP verbs”) for transmitting client requests to servers. The most commonly used HTTP request methods are GET, POST, PUT, and DELETE.
The GET request method is used by a client to fetch data from a server. If the requested resource is found on the server, it will then be sent back to the client.
The PUT method replaces existing data or creates data if it does not exist. If you use PUT many times, it will have no effect — there will only be one copy of the dataset on the server.
The POST method is used primarily to create new resources. Using POST many times will add data in multiple places on the server. It is recommended to use PUT to update resources and POST to create new resources.
The DELETE method will remove data or resources specified by the client on a server.
Although there are hundreds of APIs out there, all with their own unique purposes and specializations, it’s important to realize that at the end of the day they all use the same protocol and underlying methods for client-server communication.
Endpoints
APIs use HTTP methods to interact with data or computing services hosted on a server. These methods are useless if there isn’t a way to access specific resources with consistency. APIs utilize communication channels called endpoints so that clients can access the resources they need without complication or irregularity.
Endpoints are access points to data or computing resources hosted on a server and they take the form of an HTTP URI. Endpoints are added to an API’s base URL (e.g. http://example.com) to create a path to a specific resource or container of resources. The following are some examples of endpoints:
- http://example.com/storelocations
- http://example.com/accounts
- http://example.com/employees
The following are also valid endpoints:
- http://example.com/storelocations/sanfrancisco
- http://example.com/storelocations/newdelhi
- http://example.com/storelocations/london
You can add query strings to endpoints (e.g. http://example.com/endpoint/?id=1) to pass in variables that may be needed to complete an API’s request. Endpoints are referred to as the “nouns” that verbs (HTTP methods) act on, and APIs use this framework to fulfill requests.
More specifically, a client sends a request composed of an HTTP method (verb) and an endpoint (noun) to receive specific data or to perform a particular action on the server. It’s important to realize that the server is the one that fulfills a client’s request by translating and performing a specific operation based on the method and endpoint provided.
Since the backend is where all of the heavy lifting takes place, it could be said that an API that utilizes HTTP methods and endpoints lives on the server, acting as an implementer for client requests. This model loosely defines RESTful APIs, which are examined in more detail in the next section. For hands-on practice building endpoints for an API, please take the lab Cloud Endpoints: Qwik Start.
RESTful APIs
APIs that utilize the HTTP protocol, request methods, and endpoints are referred to as RESTful APIs. REST (Representational State Transfer) is an architectural style that prescribes standards for web-based communication. The Google description of a RESTful system:
…resources are stored in a data store; a client sends a request that the server perform a particular action (such as creating, retrieving, updating, or deleting a resource), and the server performs the action and sends a response, often in the form of a representation of the specified resource.
This resource-oriented design is a key principle of REST. RESTful APIs are modelled as:
…collections of individually-addressable resources… The resources and methods are known as nouns and verbs of APIs. With the HTTP protocol, the resource names naturally map to URLs, and methods naturally map to HTTP methods…
These terms should sound familiar since you examined these building blocks in the previous sections. REST is the most widely used framework for APIs. In 2010, about 74% of public network APIs were HTTP REST APIs.
Besides query strings, RESTful APIs can also use the following fields in their requests:
- Headers: parameters that detail the HTTP request itself.
- Body: data that a client wants to send to a server.
The body is written in the JSON or XML data formatting language.
API Data Formats (JSON)
RESTful APIs use either XML or JSON (JavaScript Object Notation) as file formats for data held in the body of an HTTP request method.
JSON has surpassed XML in RESTful API use largely because JSON is lightweight, easier to read, and faster to parse. Next, a brief introduction to JSON syntax and structurewill be covered. For a more comprehensive reference, be sure to check out the W3C’s JSON syntax documentation.
JSON supports the following data types:
- Numbers: all types — no distinction between integers and floating point values.
- Strings: text enclosed in quotes.
- Booleans: True or False values.
- Arrays: a list of elements grouped by similar type.
- Null: an “empty” value.
JSON data is composed of key-value pairs. These are linked pieces of data that are composed of a unique identifier (a key) that references piece(s) of data (value). The key must be of type string and the value can be any of the data types listed above.
The following is an example of a simple key-value pair in JSON:
"Key1" : "Value 1"
Here are some more:
"Key2" : 64

"Key3" : True

"Key4" : ["this", "is", "an", "array"]
A JSON object uses curly braces { } to group data that’s arranged in key-value pairs. The following is an example of an object that contains three key value pairs:
{
	"Name": "Julie",
	"Hometown": "Los Angeles, CA",
	"Age": 28
}
Commas separate the key-value pairs stored in an object.
JSON Validator
JSON files can contain any number of key-value pairs and/or objects. In professional development, it’s not uncommon for some files to be hundreds, if not thousands, of lines long. As a developer, you know that one small error in formatting or syntax is enough to break your entire codebase.
JSON validators like jsonlint or, if you use Chrome as your primary browser, the JSONView extension quickly identify syntax and formatting issues in your JSON code and pinpoint ways to fix it.
Get some practice with JSON validation. Open the jsonlint validator in a new tab.
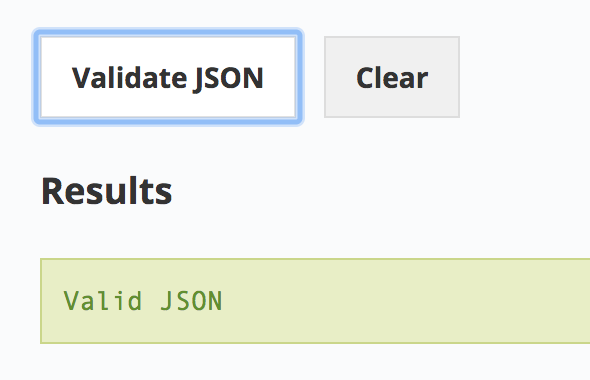
Paste the following codeblock into the validator:
{
	"Name": "Julie",
	"Hometown": "Los Angeles, CA",
	"Age": 28
}
Then click Validate JSON. You should receive a green message that says Valid JSON in the results section.
Now paste the following codeblock in the validator:
{
	"Name": "Julie"
	   "Hometown": "Los Angeles, CA",
	"Age": 28
}
Click Validate JSON.
You will see that it has a missing comma and does not maintain proper indentation. The indentation gets corrected and the validator highlights where things went wrong:

The validator identified that there was a missing identifier (a comma) after the second line, which is what was anticipated. If you add a comma after the second line and click Validate JSON you should now receive the following output:
As you work through labs using APIs and JSON, using a JSON validator like this can save you lots of headache, time, and effort in debugging syntax errors.
Creating a JSON File in the GCP Console
You will apply what you’ve learned by making Cloud Storage REST/JSON API calls in Cloud Shell to create buckets and upload content.
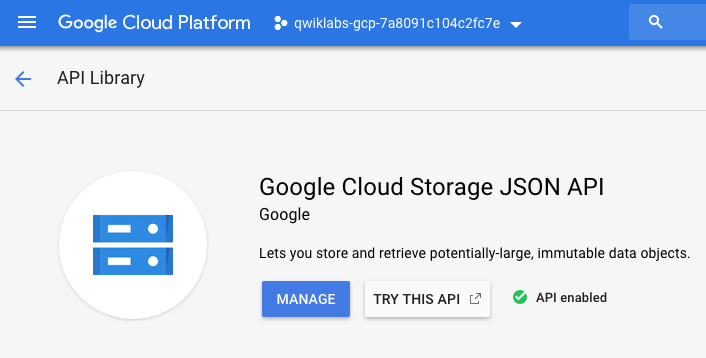
Open the following link in a new tab to ensure that the Google Cloud Storage API is enabled. You should see the following:
Now open up a Cloud Shell session. Run the following command to create and edit a file called values.json:
nano values.json
Inside the nano text editor copy and paste the following, replacing
{  "name": "<YOUR_BUCKET_NAME>",
   "location": "us",
   "storageClass": "multi_regional"
}
Once you have, exit out of the nano text editor with CNTRL+X → Y → ENTER.
You just created a JSON file that contains an object that has three key-value pairs: name, location, and storageClass. These are the same values that are required when you make a bucket with the gsutil command line tool or in the console.
Before a bucket can be created with the Cloud Storage REST/JSON API, you need to get the proper authentication and authorization policies in place.
Authentication and Authorization
The final piece to cover is the scheme of API authentication and authorization.
- Authentication refers to the process of determining a client’s identity.
- Authorization refers to the process of determining what permissions an authenticated client has for a set of resources. Authentication identifies who you are, and authorization determines what you can do.
There are three types of authentication/authorization services that Google APIs use. These are “API Keys”, “Service accounts”, and “OAuth”. An API will use one of these authentication services depending on the resources it requests and from where the API is called from.
API Keys
API keys are secret tokens that usually come in the form of an encrypted string. API keys are quick to generate and use. APIs that use public data or methods and want to get developers up and running quickly will oftentimes use API keys to authenticate users.
In GCP terms, API keys identify the calling project making the call to an API. By identifying the calling project, API keys enable usage information to be associated with that project, and they can reject calls from projects that haven’t been granted access or enabled by the API.
OAuth
OAuth tokens are similar to API keys in their format, but they are more secure and can be linked to user accounts or identities. These tokens are used primarily when APIs give a developer the means to access user data.
While API keys give developers access to all of an API’s functionality, OAuth client IDs are all based on scope; different privileges will be granted to different identities.
Service Accounts
A service account is a special type of Google account that belongs to your application or a virtual machine (VM) instead of to an individual end user. Your application assumes the identity of the service account to call Google APIs, so that the users aren’t directly involved.
You can use a service account by providing its private key to your application, or by using the built-in service accounts available when running on Google Cloud Functions, Google App Engine, Google Compute Engine, or Google Kubernetes Engine.
For a lab specifically dealing with service accounts and roles, see: Service Accounts and Roles: Fundamentals.
Authenticate and authorize the Cloud Storage JSON/REST API
Since Cloud Storage is a platform that hosts and provides access to user data, you need to generate an OAuth token before you use its services.
Open the OAuth 2.0 playground in a new tab. This is a service that allows you to generate OAuth tokens with ease.
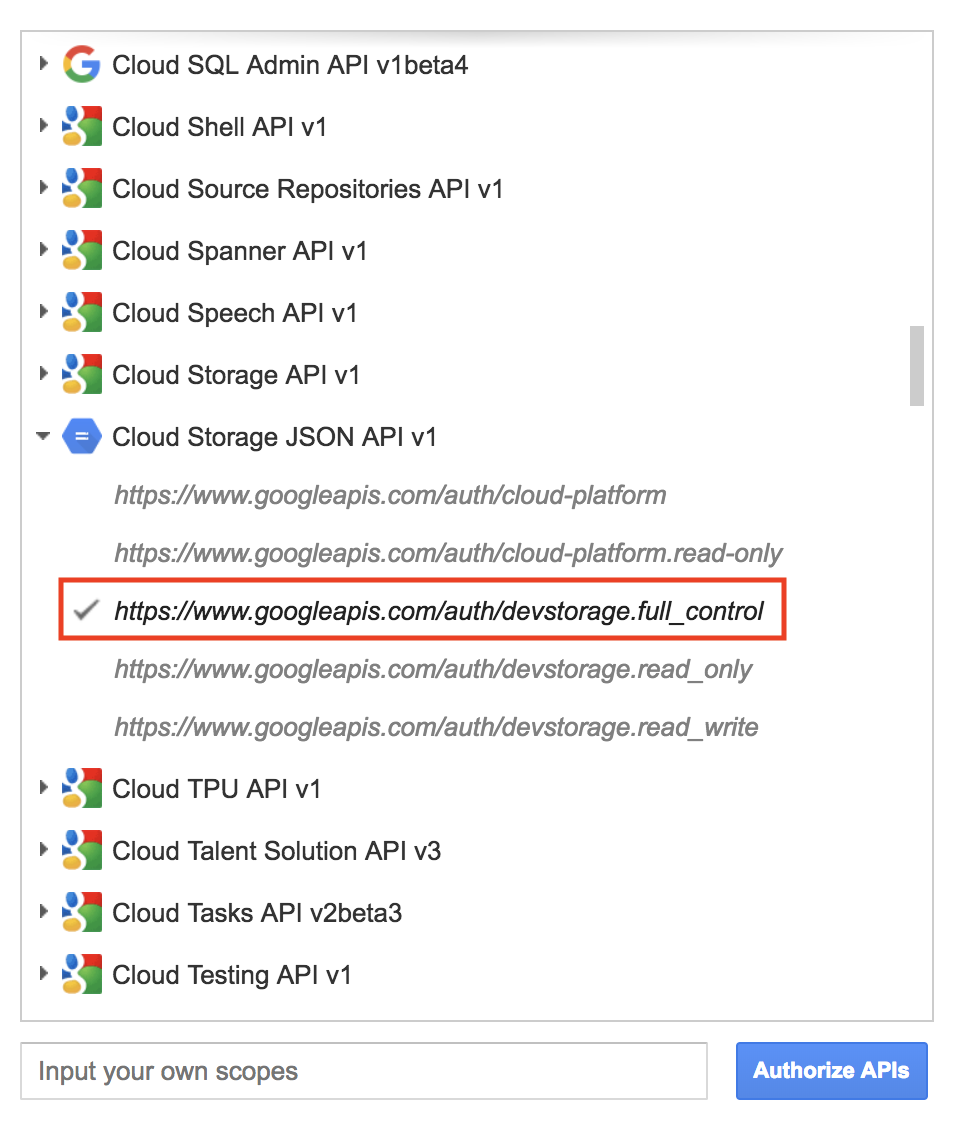
Scroll down and select Cloud Storage JSON API V1. Then select the https://www.googleapis.com/auth/devstorage.full_control scope:
Click on the blue box that says Authorize APIs. This will open a Google Sign-in page. Select your Qwiklabs username and then click Allow when prompted for permissions.
Step 2 should now have an authorization code generated. Click on Exchange authorization code for tokens. If you get moved to Step 3, click on the Step 2 panel. Your page should resemble the following:
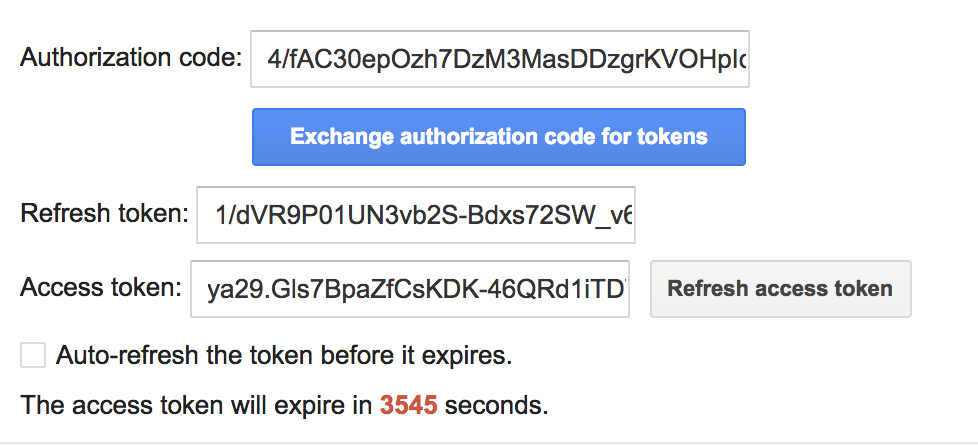
Copy the access token, it will be used in the following step.
Create a bucket with the Cloud Storage JSON/REST API
Return to your Cloud Shell session. At the CLI prompt, type in ls and hit enter. You should see the values.json file that you created before and a README-cloudshell.txt file:
README-cloudshell.txt values.json
Run the following command to set your OAuth2 token as an environment variable, replacing
export OAUTH2_TOKEN=<YOUR_TOKEN>
Run the following command to set your GCP Project ID as an environment variable, replacing
export PROJECT_ID=<YOUR_PROJECT_ID>
Now run the following command to create a Cloud Storage bucket:
curl -X POST --data-binary @values.json \
    -H "Authorization: Bearer $OAUTH2_TOKEN" \
    -H "Content-Type: application/json" \
    "https://www.googleapis.com/storage/v1/b?project=$PROJECT_ID"
You should receive a similar output:
{
 "kind": "storage#bucket",
 "id": "qwiklabs-test-bucket",
 "selfLink": "https://www.googleapis.com/storage/v1/b/sean123456789",
 "projectNumber": "218136653205",
 "name": "sean123456789",
 "timeCreated": "2018-10-19T21:04:03.604Z",
 "updated": "2018-10-19T21:04:03.604Z",
 "metageneration": "1",
 "location": "US",
 "storageClass": "MULTI_REGIONAL",
 "etag": "CAE="
}
Note: If you received an error message like “Use of this bucket name is restricted” or “Sorry, that name is not available”, it means that there is a conflict with the universal bucket naming convention. Edit the values.json file and replace the bucket name.
This request is the culmination of everything you’ve learned about so far. You used the curl CLI tool to make an HTTP POST method request. You passed in the values.json file into the request body. You passed the OAuth token and a JSON specification as request headers. This request was routed to the Cloud Storage endpoint, which contains a query string parameter set to your GCP Project ID.
View your newly created Cloud Storage Bucket
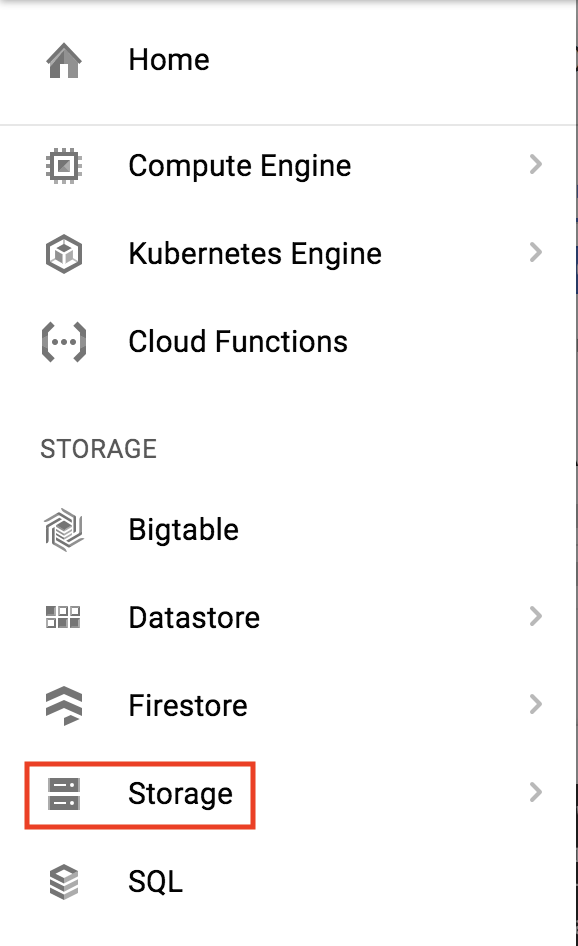
To see your newly created bucket, from the Navigation menu select Storage > Browser:
Upload a file using the Cloud Storage JSON/REST API
You can use the Cloud Storage JSON/REST API to upload files to buckets.
Save the following image to your computer and name it demo-image.png:
In your Cloud Shell session, click on the three-dotted menu icon in the top-right corner and click Upload file. Select demo-image.png. This will add the image to your directory.
Run the following command to get the path to the image file:
realpath demo-image.png
You should receive a similar output:
/home/gcpstaging25084_student/demo-image.png
Set the file path as an environment variable by running the following command, replacing
export OBJECT=<DEMO_IMAGE_PATH>
Set your bucket name as an environment variable by running the following command, replacing
export BUCKET_NAME=<YOUR_BUCKET>
Now run the following command to upload the demo image to your Cloud Storage bucket:
curl -X POST --data-binary @$OBJECT \
    -H "Authorization: Bearer $OAUTH2_TOKEN" \
    -H "Content-Type: image/png" \
    "https://www.googleapis.com/upload/storage/v1/b/$BUCKET_NAME/o?uploadType=media&name=demo-image"
You should receive a similar output:
{
 "kind": "storage#object",
 "id": "qwiklabs-test-bucket/demo-image/1539990580500843",
 "selfLink": "https://www.googleapis.com/storage/v1/b/qwiklabs-test-bucket/o/demo-image",
 "name": "demo-image",
 "bucket": "qwiklabs-test-bucket",
 "generation": "1539990580500843",
 "metageneration": "1",
 "contentType": "image/png",
 "timeCreated": "2018-10-19T23:09:40.500Z",
 "updated": "2018-10-19T23:09:40.500Z",
 "storageClass": "MULTI_REGIONAL",
 "timeStorageClassUpdated": "2018-10-19T23:09:40.500Z",
 "size": "77430",
 "md5Hash": "sJd98pyssh0tmYr4FPgXpg==",
 "mediaLink": "https://www.googleapis.com/download/storage/v1/b/qwiklabs-test-bucket/o/demo-image?generation=1539990580500843&alt=media",
 "crc32c": "e1XZrA==",
 "etag": "COuyiPzPk94CEAE="
}
To see the image that was added to your bucket, open the navigation menu and select Storage > Browser. Then click on the name of your bucket. You should see that demo-image has been added:
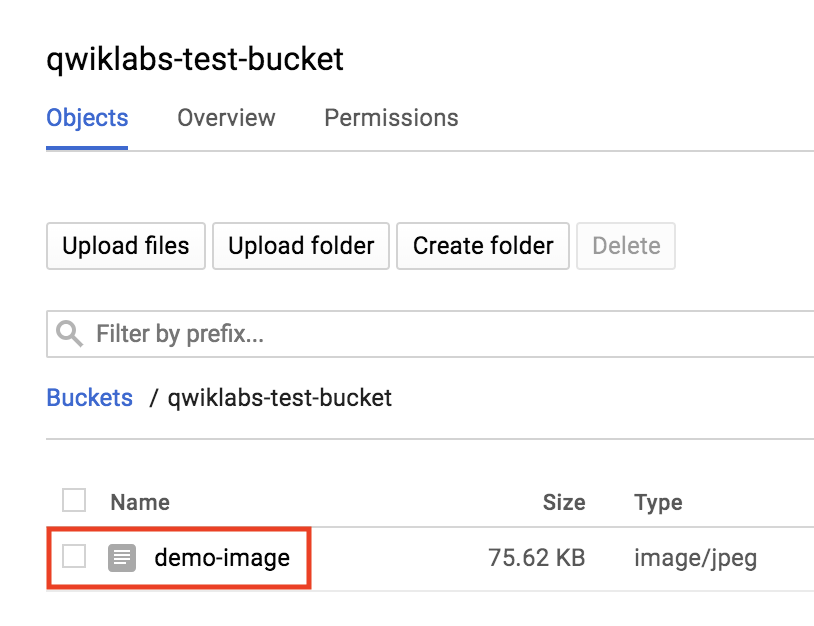
Clicking on the image will open it in a new tab.
Extract, Analyze, and Translate Text from Images with the Cloud ML APIs
Create an API Key
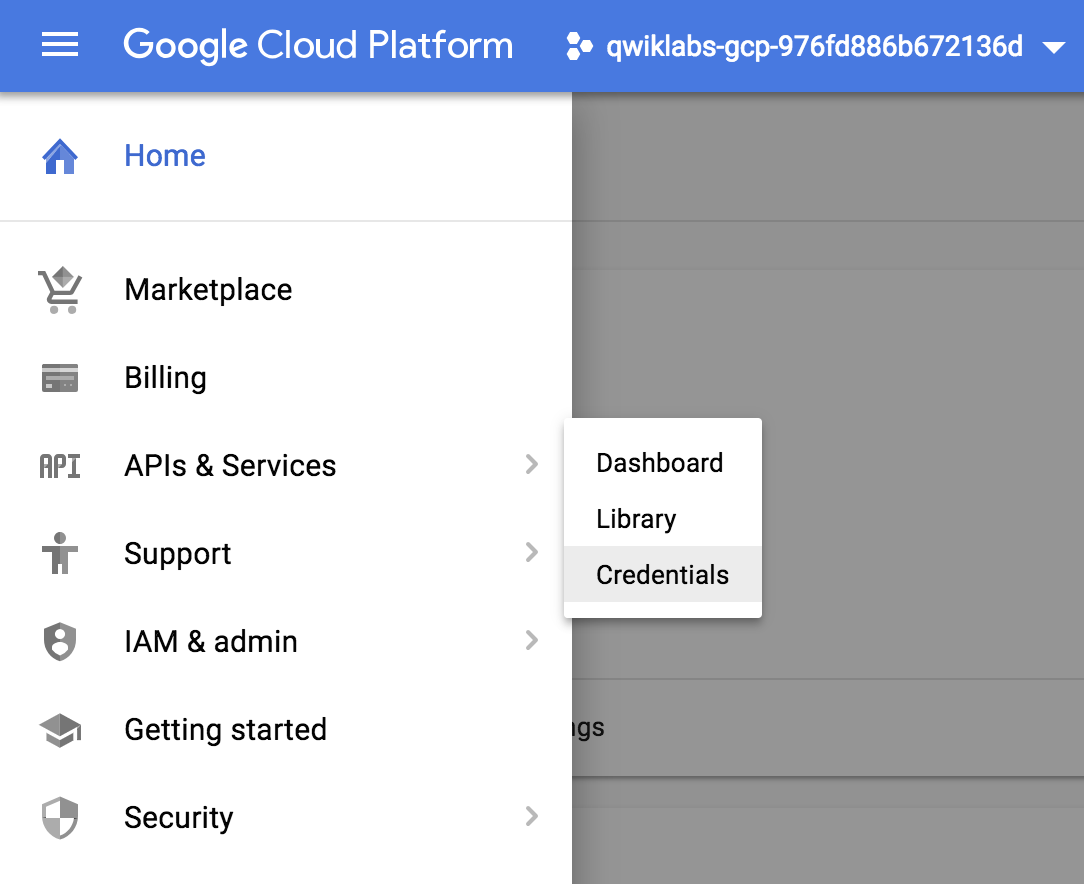
Since you’ll be using curl to send a request to the Vision API, you’ll need to generate an API key to pass in your request URL. To create an API key, navigate to:
APIs & services > Credentials:
Then click Create credentials:
In the drop down menu, select API key:
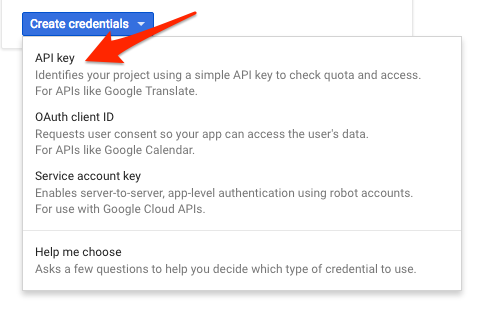
Next, copy the key you just generated. Click Close.
Now that you have an API key, save it to an environment variable to avoid having to insert the value of your API key in each request. You can do this in Cloud Shell. Be sure to replace <your_api_key> with the key you just copied.
export API_KEY=<YOUR_API_KEY>
Upload an image to a cloud storage bucket
Creating a Cloud Storage bucket
There are two ways to send an image to the Vision API for image detection: by sending the API a base64 encoded image string, or passing it the URL of a file stored in Google Cloud Storage. For this lab you’ll create a Google Cloud Storage bucket to store your images.
Navigate to the Storage browser in the Cloud console:
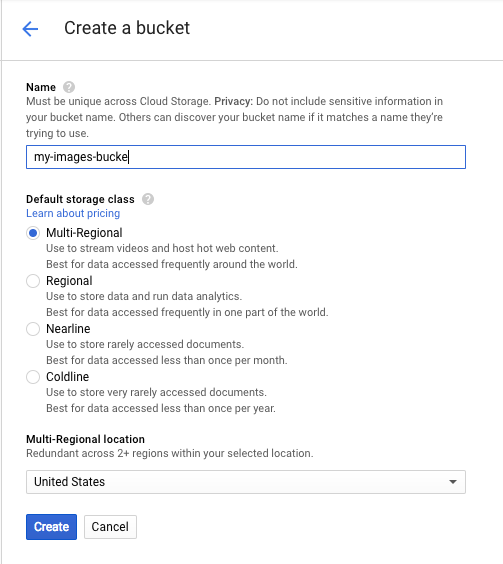
Then click Create bucket.
Give your bucket a globally unique name and click Create.
Upload an image to your bucket
Right click on the following image of a French sign, then click Save image as and save it to your computer as sign.jpg.
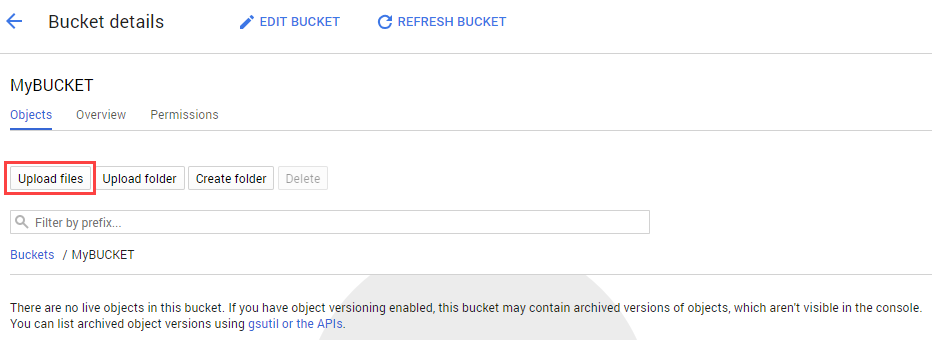
Navigate to the bucket you just created in the storage browser and click Upload files. Then select sign.jpg.
Next you’ll allow the file to be viewed publicly while keeping the access to the bucket private.
Click on the 3 dots for the image file:
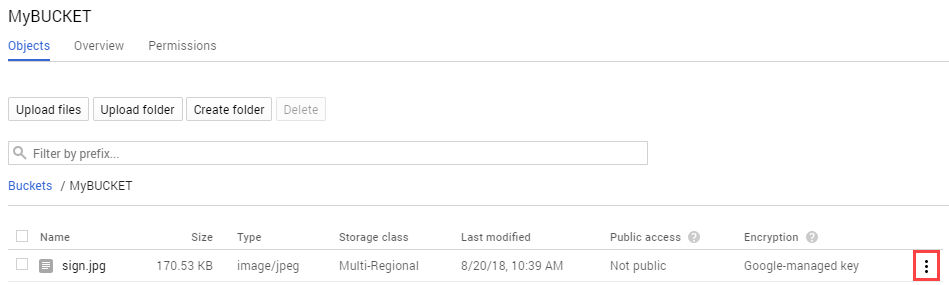
Select Edit Permissions.
Now click Add Item and set the following:
- Select “User” for the Entity.
- Type “allUsers” for the Name.
- Select “Reader” for the Access.
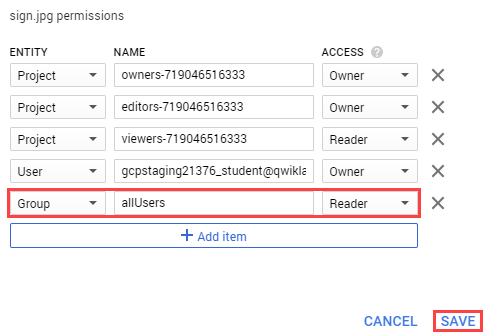
Click Save.
You’ll now see that the file has public access.
Now that you have the file in your bucket, you’re ready to create a Vision API request, passing it the URL of this picture.
Create your Vision API request
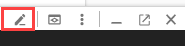
In your Cloud Shell environment, create an ocr-request.json then add the code below to the file, replacing my-bucket-name with the name of the bucket you created. You can create the file using one of your preferred command line editors (nano, vim, emacs) or click the pencil icon to open the code editor in Cloud Shell:
Add the following to your ocr-request.json file:
{
  "requests": [
      {
        "image": {
          "source": {
              "gcsImageUri": "gs://my-bucket-name/sign.jpg"
          }
        },
        "features": [
          {
            "type": "TEXT_DETECTION",
            "maxResults": 10
          }
        ]
      }
  ]
}
You’re going to use the TEXT_DETECTION feature of the Vision API. This will run optical character recognition (OCR) on the image to extract text.
Call the Vision API’s text detection method
In Cloud Shell, call the Vision API with curl:
curl -s -X POST -H "Content-Type: application/json" --data-binary @ocr-request.json https://vision.googleapis.com/v1/images:annotate?key=${API_KEY}
The first part of your response should look like the following:
{
  "responses": [
    {
      "textAnnotations": [
        {
          "locale": "fr",
          "description": "LE BIEN PUBLIC\nles dépeches\nPour Obama,\nla moutarde\nest\nde Dijon\n",
          "boundingPoly": {
            "vertices": [
              {
                "x": 146,
                "y": 48
              },
              {
                "x": 621,
                "y": 48
              },
              {
                "x": 621,
                "y": 795
              },
              {
                "x": 146,
                "y": 795
              }
            ]
          }
        },
        {
          "description": "LE",
          "boundingPoly": {
            "vertices": [
              {
                "x": 146,
                "y": 99
              },
              {
                "x": 274,
                "y": 85
              },
              {
                "x": 284,
                "y": 175
              },
              {
                "x": 156,
                "y": 189
              }
            ]
          }
        },
        {
          "description": "BIEN",
          "boundingPoly": {
            "vertices": [
              {
                "x": 292,
                "y": 83
              },
              {
                "x": 412,
                "y": 70
              },
            }
            ...
      ]
}]
}
The OCR method is able to extract lots of text from our image, cool! Let’s break down the response. The first piece of data you get back from textAnnotations is the entire block of text the API found in the image. This includes the language code (in this case fr for French), a string of the text, and a bounding box indicating where the text was found in our image. Then you get an object for each word found in the text with a bounding box for that specific word.
Note: The Vision API also has a DOCUMENT_TEXT_DETECTION feature optimized for images with more text. This response includes additional information and breaks text down into page, blocks, paragraphs, and words.
Unless you speak French you probably don’t know what this says. The next step is translation.
Run the following curl command to save the response to an ocr-response.json file so it can be referenced later:
curl -s -X POST -H "Content-Type: application/json" --data-binary @ocr-request.json https://vision.googleapis.com/v1/images:annotate?key=${API_KEY} -o ocr-response.json
Sending text from the image to the Translation API
The Translation API can translate text into 100+ languages. It can also detect the language of the input text. To translate the French text into English, all you need to do is pass the text and the language code for the target language (en-US) to the Translation API.
First, create a translation-request.json file and add the following to it:
{
  "q": "your_text_here",
  "target": "en"
}
q is where you’ll pass the string to translate.
Save the file.
Run this Bash command in Cloud Shell to extract the image text from the previous step and copy it into a new translation-request.json (all in one command):
STR=$(jq .responses[0].textAnnotations[0].description ocr-response.json) && STR="${STR//\"}" && sed -i "s|your_text_here|$STR|g" translation-request.json
Now you’re ready to call the Translation API. This command will also copy the response into a translation-response.json file:
curl -s -X POST -H "Content-Type: application/json" --data-binary @translation-request.json https://translation.googleapis.com/language/translate/v2?key=${API_KEY} -o translation-response.json
Run this command to inspect the file with the Translation API response:
cat translation-response.json
Awesome, you can understand what the sign said!
{
  "data": {
    "translations": [
      {
        "translatedText": "THE PUBLIC GOOD the despatches For Obama, the mustard is from Dijon",
        "detectedSourceLanguage": "fr"
      }
    ]
  }
}
In the response, translatedText contains the resulting translation, and detectedSourceLanguage is fr, the ISO language code for French. The Translation API supports 100+ languages, all of which are listed here.
In addition to translating the text from our image, you might want to do more analysis on it. That’s where the Natural Language API comes in handy. Onward to the next step!
Analyzing the image’s text with the Natural Language API
The Natural Language API helps us understand text by extracting entities, analyzing sentiment and syntax, and classifying text into categories. Use the analyzeEntities method to see what entities the Natural Language API can find in the text from your image.
To set up the API request, create a nl-request.json file with the following:
{
  "document":{
    "type":"PLAIN_TEXT",
    "content":"your_text_here"
  },
  "encodingType":"UTF8"
}
In the request, you’re telling the Natural Language API about the text you’re sending:
type: Supported type values are PLAIN_TEXT or HTML.
content: pass the text to send to the Natural Language API for analysis. The Natural Language API also supports sending files stored in Cloud Storage for text processing. To send a file from Cloud Storage, you would replace content with gcsContentUri and use the value of the text file’s uri in Cloud Storage.
encodingType: tells the API which type of text encoding to use when processing the text. The API will use this to calculate where specific entities appear in the text.
Run this Bash command in Cloud Shell to copy the translated text into the content block of the Natural Language API request:
STR=$(jq .data.translations[0].translatedText translation-response.json) && STR="${STR//\"}" && sed -i "s|your_text_here|$STR|g" nl-request.json
The nl-request.json file now contains the translated English text from the original image. Time to analyze it!
Call the analyzeEntities endpoint of the Natural Language API with this curl request:
curl "https://language.googleapis.com/v1/documents:analyzeEntities?key=${API_KEY}" \
  -s -X POST -H "Content-Type: application/json" --data-binary @nl-request.json
In the response you can see the entities the Natural Language API found:
{
  "entities": [
    {
      "name": "despatches",
      "type": "OTHER",
      "metadata": {},
      "salience": 0.31271625,
      "mentions": [
        {
          "text": {
            "content": "despatches",
            "beginOffset": 20
          },
          "type": "COMMON"
        }
      ]
    },
    {
      "name": "PUBLIC GOOD",
      "type": "OTHER",
      "metadata": {
        "mid": "/m/017bkk",
        "wikipedia_url": "https://en.wikipedia.org/wiki/Public_good"
      },
      "salience": 0.28040817,
      "mentions": [
        {
          "text": {
            "content": "PUBLIC GOOD",
            "beginOffset": 4
          },
        {
          "type": "PROPER"
        }
      ]
    },
    {
      "name": "Obama",
      "type": "PERSON",
      "metadata": {
        "wikipedia_url": "https://en.wikipedia.org/wiki/Barack_Obama",
        "mid": "/m/02mjmr"
      },
      "salience": 0.19405179,
      "mentions": [
        {
          "text": {
            "content": "Obama",
            "beginOffset": 35
          },
          "type": "PROPER"
        }
      ]
    },
    {
      "name": "mustard",
      "type": "OTHER",
      "metadata": {},
      "salience": 0.11838918,
      "mentions": [
        {
          "text": {
            "content": "mustard",
            "beginOffset": 46
          },
          "type": "COMMON"
        }
      ]
    },
    {
      "name": "Dijon",
      "type": "LOCATION",
      "metadata": {
        "mid": "/m/0pbhz",
        "wikipedia_url": "https://en.wikipedia.org/wiki/Dijon"
      },
      "salience": 0.09443461,
      "mentions": [
        {
          "text": {
            "content": "Dijon",
            "beginOffset": 62
          },
          "type": "PROPER"
        }
      ]
    }
  ],
  "language": "en"
}
For entities that have a wikipedia page, the API provides metadata including the URL of that page along with the entity’s mid. The mid is an ID that maps to this entity in Google’s Knowledge Graph. To get more information on it, you could call the Knowledge Graph API, passing it this ID. For all entities, the Natural Language API tells us the places it appeared in the text (mentions), the type of entity, and salience (a [0,1] range indicating how important the entity is to the text as a whole). In addition to English, the Natural Language API also supports the languages listed here.
Looking at this image it’s relatively easy for us to pick out the important entities, but if we had a library of thousands of images this would be much more difficult. OCR, translation, and natural language processing can help to extract meaning from large datasets of images.
Classify Text into Categories with the Natural Language API
Confirm that the Cloud Natural Language API is enabled
Click the menu icon in the top left of the screen.
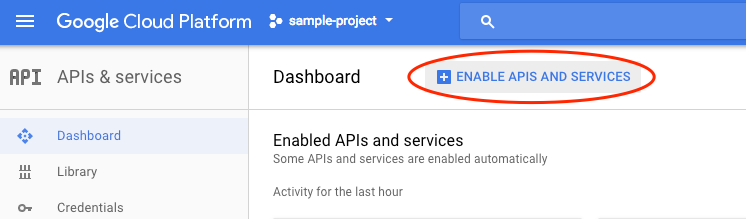
Select APIs & services > Dashboard.
Click Enable APIs and services.
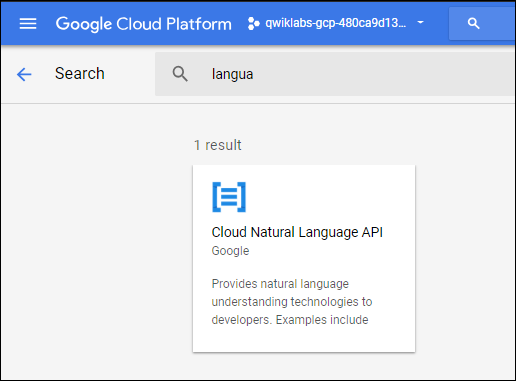
Then, search for “language” in the search box. Click Google Cloud Natural Language API:
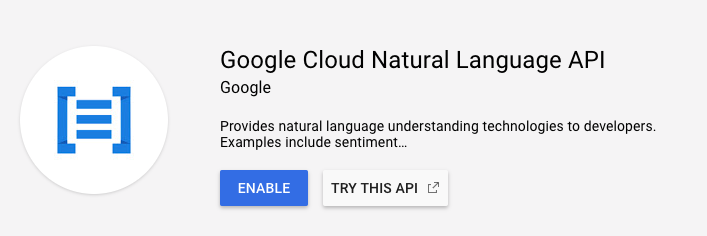
If the API is not enabled, you’ll see the Enable button. Click Enable to enable the Cloud Natural Language API:
Create an API Key
Since you’re using curl to send a request to the Natural Language API, you need to generate an API key to pass in the request URL.
To create an API key, in your Console, click Navigation menu > APIs & services > Credentials:
Then click Create credentials:
In the drop down menu, select API key:
Next, copy the key you just generated. Then click Close.
Now that you have an API key, save it to an environment variable to avoid having to insert the value of your API key in each request.
In Cloud Shell run the following. Be sure to replace
export API_KEY=<YOUR_API_KEY>
Classify a news article
Using the Natural Language API’s classifyText method, you can sort text data into categories with a single API call. This method returns a list of content categories that apply to a text document. These categories range in specificity, from broad categories like /Computers & Electronics to highly specific categories such as /Computers & Electronics/Programming/Java (Programming Language). A full list of 700+ possible categories can be found here.
We’ll start by classifying a single article, and then we’ll see how we can use this method to make sense of a large news corpus. To start, let’s take this headline and description from a New York Times article in the food section:
A Smoky Lobster Salad With a Tapa Twist. This spin on the Spanish pulpo a la gallega skips the octopus, but keeps the sea salt, olive oil, pimentón and boiled potatoes.
In your Cloud Shell environment, create a request.json file with the code below. You can either create the file using one of your preferred command line editors (nano, vim, emacs) or use the Cloud Shell code editor:
Create a new file named request.json and add the following:
{
  "document":{
    "type":"PLAIN_TEXT",
    "content":"A Smoky Lobster Salad With a Tapa Twist. This spin on the Spanish pulpo a la gallega skips the octopus, but keeps the sea salt, olive oil, pimentón and boiled potatoes."
  }
}
Now you can send this text to the Natural Language API’s classifyText method with the following curl command:
curl "https://language.googleapis.com/v1/documents:classifyText?key=${API_KEY}" \
  -s -X POST -H "Content-Type: application/json" --data-binary @request.json
Look at the response:
{ categories:
  [
    {
      name: '/Food & Drink/Cooking & Recipes',
       confidence: 0.85
    },
    {
       name: '/Food & Drink/Food/Meat & Seafood',
       confidence: 0.63
     }
  ]
}
The API returned 2 categories for this text:
- /Food & Drink/Cooking & Recipes
- /Food & Drink/Food/Meat & Seafood The text doesn’t explicitly mention that this is a recipe or even that it includes seafood, but the API is able to categorize it. Classifying a single article is cool, but to really see the power of this feature, let’s classify lots of text data.
Classifying a large text dataset
To see how the classifyText method can help us understand a dataset with lots of text, you’ll use this public dataset of BBC news articles. The dataset consists of 2,225 articles in five topic areas (business, entertainment, politics, sports, tech) from 2004 - 2005. A subset of these articles are in a public Google Cloud Storage bucket. Each of the articles is in a .txt file.
To examine the data and send it to the Natural Language API, you’ll write a Python script to read each text file from Cloud Storage, send it to the classifyText endpoint, and store the results in a BigQuery table. BigQuery is Google Cloud’s big data warehouse tool - it lets you easily store and analyze large data sets.
To see the type of text you’ll be working with, run the following command to view one article (gsutil provides a command line interface for Cloud Storage):
gsutil cat gs://text-classification-codelab/bbc_dataset/entertainment/001.txt
Next you’ll create a BigQuery table for your data.
Creating a BigQuery table for our categorized text data
Before sending the text to the Natural Language API, you need a place to store the text and category for each article.
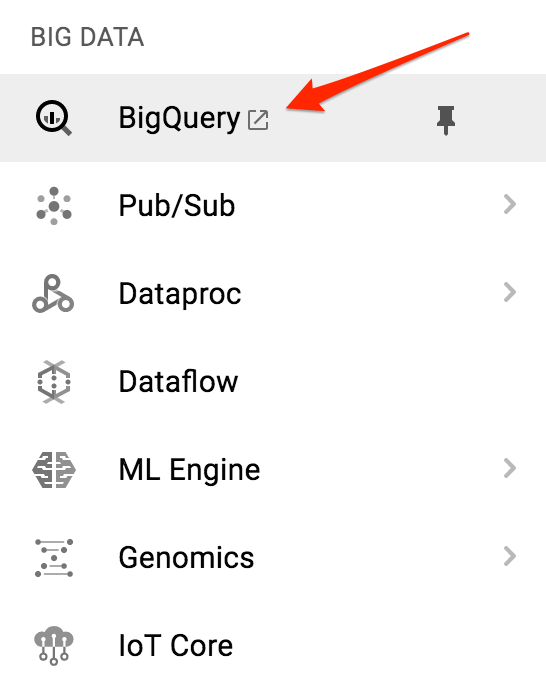
Navigate to the BigQuery in the Console.
Then click on the name of your project, then Create dataset:
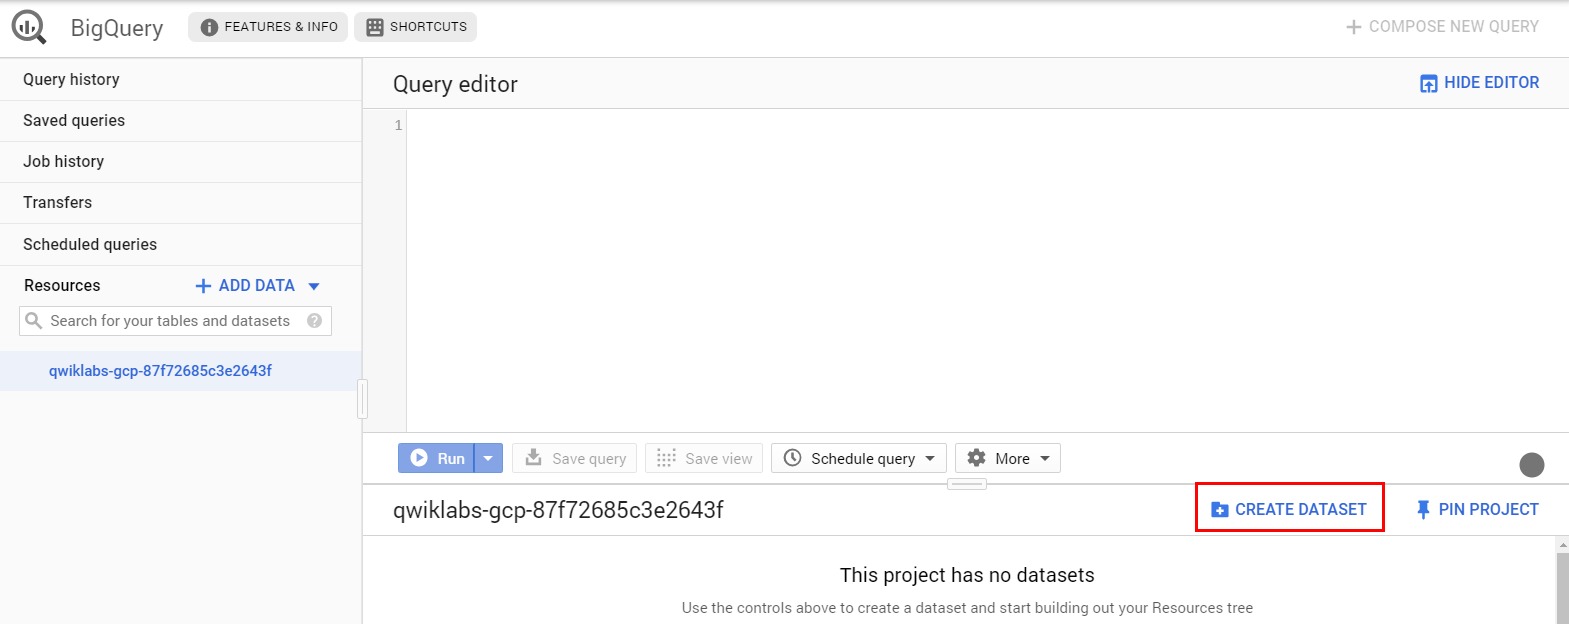
Name the dataset: news_classification_dataset
Click Create dataset.
Click on the name of the dataset, then select Create new table. Use the following settings for the new table:
- Create From: empty table
- Name your table article_data
- Click Add Field and add the following 3 fields: article_text, category, and confidence.
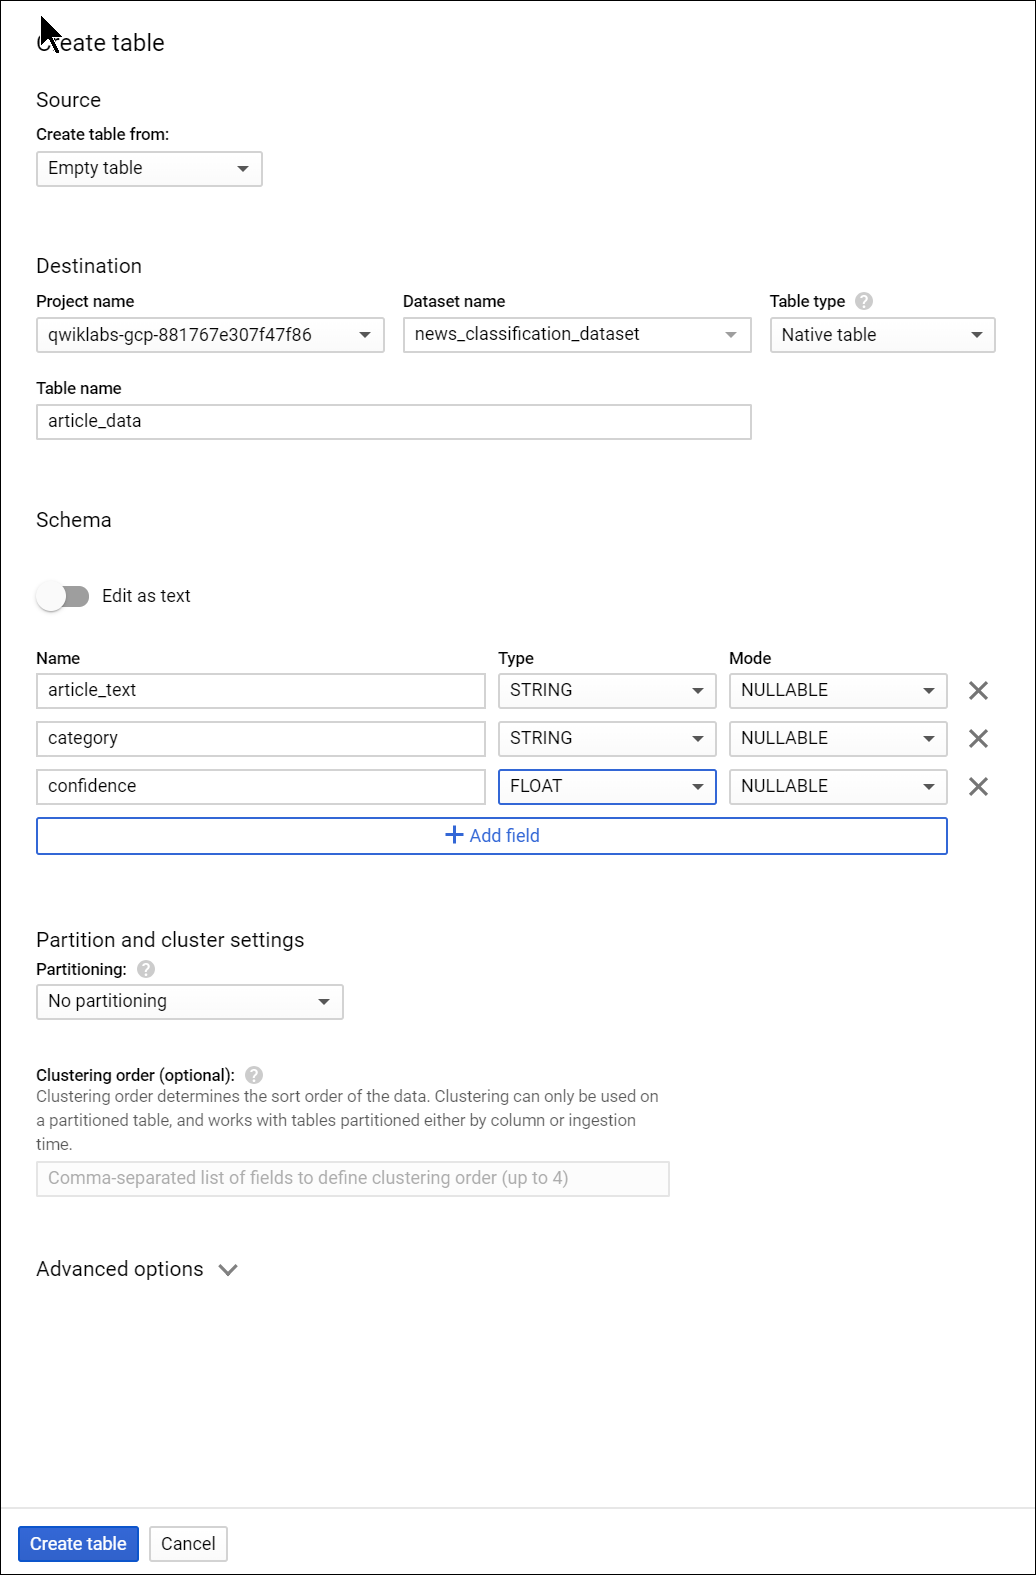
Click Create Table.
The table is empty right now. In the next step you’ll read the articles from Cloud Storage, send them to the Natural Language API for classification, and store the result in BigQuery.
Classifying news data and storing the result in BigQuery
Before writing a script to send the news data to the Natural Language API, you need to create a service account. This will be used to authenticate to the Natural Language API and BigQuery from a Python script.
First, back in Cloud Shell, export the name of your Cloud project as an environment variable. Replace <your_project_name> with the GCP Project ID found in the CONNECTION DETAILS section of the lab:
export PROJECT=<your_project_name>
Then run the following commands from Cloud Shell to create a service account:
gcloud iam service-accounts create my-account --display-name my-account
gcloud projects add-iam-policy-binding $PROJECT --member=serviceAccount:my-account@$PROJECT.iam.gserviceaccount.com --role=roles/bigquery.admin
gcloud iam service-accounts keys create key.json --iam-account=my-account@$PROJECT.iam.gserviceaccount.com
export GOOGLE_APPLICATION_CREDENTIALS=key.json
Now you’re ready to send the text data to the Natural Language API!
To do that, write a Python script using the Python module for Google Cloud. You can accomplish the same thing from any language, there are many different cloud client libraries.
Create a file called classify-text.py and copy the following into it. Replace YOUR_PROJECT with your GCP Project ID.
from google.cloud import storage, language, bigquery

# Set up our GCS, NL, and BigQuery clients
storage_client = storage.Client()
nl_client = language.LanguageServiceClient()
# TODO: replace YOUR_PROJECT with your project id below
bq_client = bigquery.Client(project='YOUR_PROJECT')

dataset_ref = bq_client.dataset('news_classification_dataset')
dataset = bigquery.Dataset(dataset_ref)
table_ref = dataset.table('article_data') # Update this if you used a different table name
table = bq_client.get_table(table_ref)

# Send article text to the NL API's classifyText method
def classify_text(article):
        response = nl_client.classify_text(
                document=language.types.Document(
                        content=article,
                        type=language.enums.Document.Type.PLAIN_TEXT
                )
        )
        return response

rows_for_bq = []
files = storage_client.bucket('text-classification-codelab').list_blobs()
print("Got article files from GCS, sending them to the NL API (this will take ~2 minutes)...")

# Send files to the NL API and save the result to send to BigQuery
for file in files:
        if file.name.endswith('txt'):
                article_text = file.download_as_string()
                nl_response = classify_text(article_text)
                if len(nl_response.categories) > 0:
                        rows_for_bq.append((article_text, nl_response.categories[0].name, nl_response.categories[0].confidence))

print("Writing NL API article data to BigQuery...")
# Write article text + category data to BQ
errors = bq_client.insert_rows(table, rows_for_bq)
assert errors == []
Now you’re ready to start classifying articles and importing them to BigQuery. Run the following script:
python classify-text.py
The script takes about two minutes to complete, so while it’s running let’s discuss what’s happening.
We’re using the google-cloud Python client library to access Cloud Storage, the Natural Language API, and BigQuery. First, a client is created for each service; then references are created to the BigQuery table. files is a reference to each of the BBC dataset files in the public bucket. We iterate through these files, download the articles as strings, and send each one to the Natural Language API in our classify_text function. For all articles where the Natural Language API returns a category, the article and its category data are saved to a rows_for_bq list. When classifying each article is done, the data is inserted into BigQuery using insert_rows().
Note: The Natural Language API can return more than one category for a document, but for this lab you’re only storing the first category returned to keep things simple.
When the script has finished running, it’s time to verify that the article data was saved to BigQuery.
In BigQuery, navigate to the article_data table in the BigQuery tab and click Query Table:
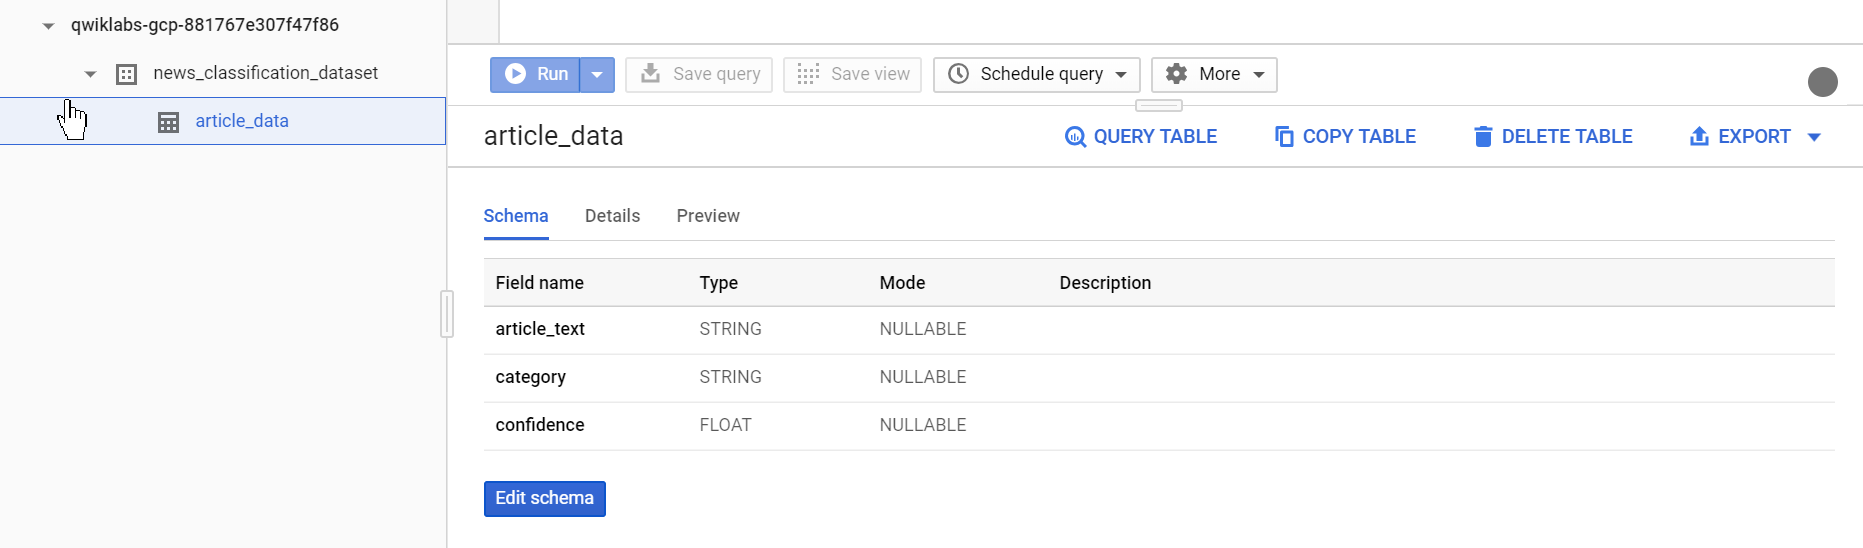
Edit the results in the Unsaved query box, adding an asterisk between SELECT and FROM:
SELECT * FROM `YOUR_PROJECT.news_classification_dataset.article_data`
Now click Run.
You will see your data when the query completes. Scroll to the right to see the category column.
The category column has the name of the first category the Natural Language API returned for the article, and confidence is a value between 0 and 1 indicating how confident the API is that it categorized the article correctly. You’ll learn how to perform more complex queries on the data in the next step.
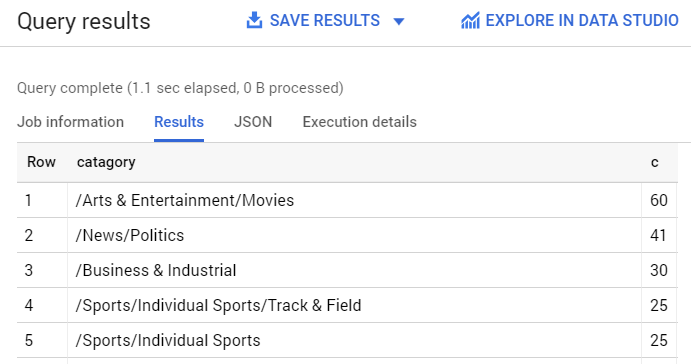
Analyzing categorized news data in BigQuery First, see which categories were most common in the dataset.
In the BigQuery console, click Compose New Query.
Enter the following query, replacing YOUR_PROJECT with your project name:
SELECT
  category,
  COUNT(*) c
FROM
  `YOUR_PROJECT.news_classification_dataset.article_data`
GROUP BY
  category
ORDER BY
  c DESC
Now click Run.
You should see something like this in the query results:
If you wanted to find the article returned for a more obscure category like /Arts & Entertainment/Music & Audio/Classical Music, you could write the following query:
SELECT * FROM `YOUR_PROJECT.news_classification_dataset.article_data`
WHERE category = "/Arts & Entertainment/Music & Audio/Classical Music"
Or, you could get only the articles where the Natural language API returned a confidence score greater than 90%:
SELECT
  article_text,
  category
FROM `YOUR_PROJECT.news_classification_dataset.article_data`
WHERE cast(confidence as float64) > 0.9
To perform more queries on your data, explore the BigQuery documentation. BigQuery also integrates with a number of visualization tools. To create visualizations of your categorized news data, check out the Data Studio quickstart for BigQuery.